Warning: This isn’t an explanation post about theory, this is a post about a series of steps which you can follow to make sure to setting up a Version Control in a Unity3D project/game.
This configuration works in OS X and Windows.
Setting up Version Control
- Download latest Unity’s version.
- Open or create a Unity project:
- Select Edit -> Project Settings -> Editor
- Set Version Control Mode to Visible Meta Files
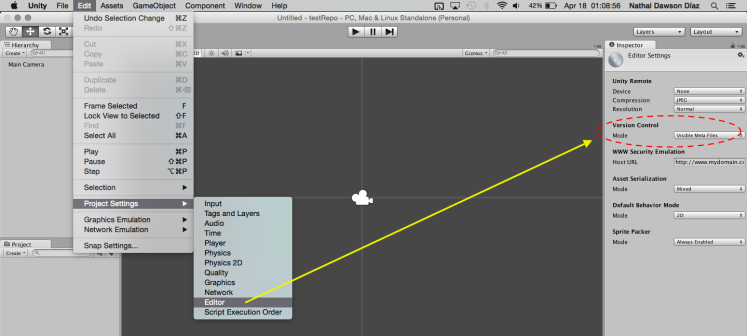
Setting the Version Control Mode
- Download and install Mercurial and SourceTree.
- Open SourceTree and Create a local repository.
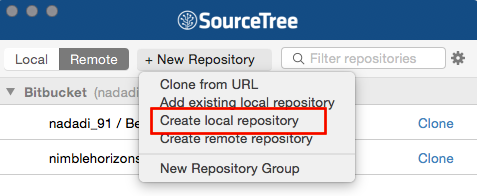
Create Local Repository -
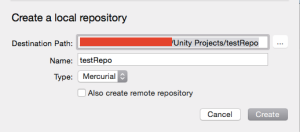
Selecting Destination Path and Type. In Destination Path field you have to select the root folder of your project/game (I mean the folder with the Assets, Library, Project Settings and Temp folders), also you have to set the Repository Type to Mercurial.
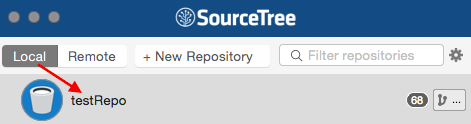
- Open the local repository you’ve created (doble-click in the name).
Open the Local Repository - Select Repository -> Repository Settings…
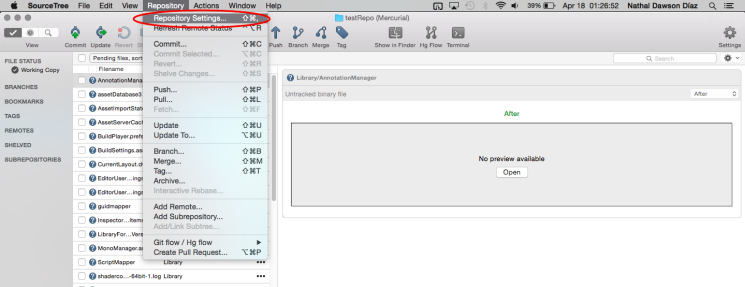
Selecting Repository Settings - We aren’t interested in all the project files, therefore we should edit the “.hgignore” file. To do it we have to select Advanced tab, and then select edit in the field called Repository-specific ignore list.
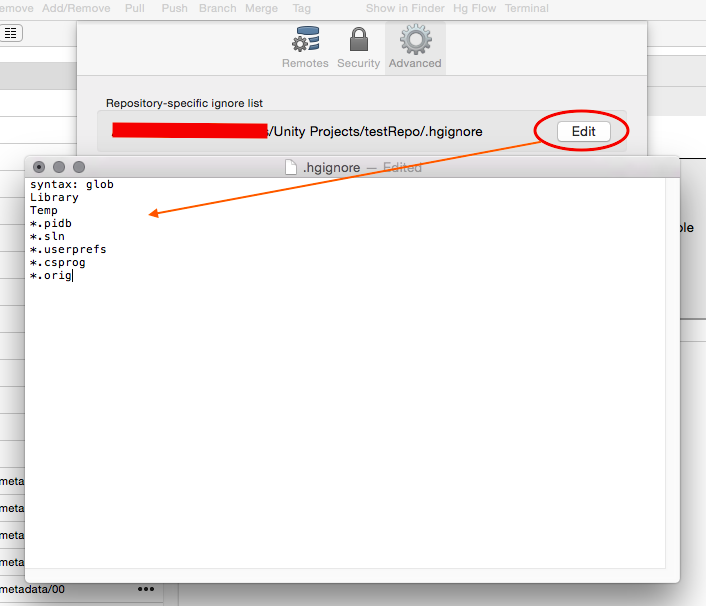
Editing “.hgignore” file - Write the following in the “.hgignore” file and Save it:
-
syntax: glob
Library
Temp
*.pidb
*.sln
*.userprefs
*.csprog
*.orig

This allows you to ignore some files (you can include any files you don't want to track in ".hgignore")."
- Now you have to do the first commit of the repository:
- Check the option of Pending Files.
- Write a message to commit.
- Press the commit button.

Doing the first commit
- You will notice that the Push button have the number one, DON’T touch it yet.

Push Button - Create a user account in Bitbucket:
- Create a new Repository.
- Select Clone and Copy the URL (from http).
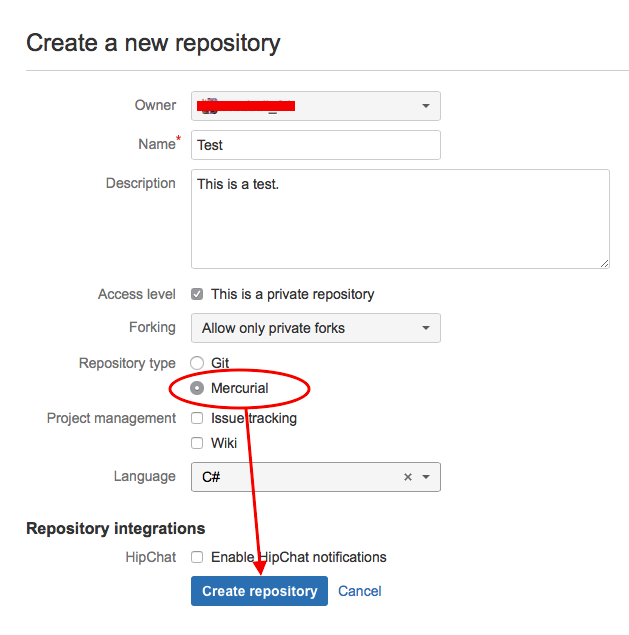
Creating New Repository 
Copying the URL
- In SourceTree select Repository -> Repository Settings, and in the Remotes Tab you have to click on Add button.
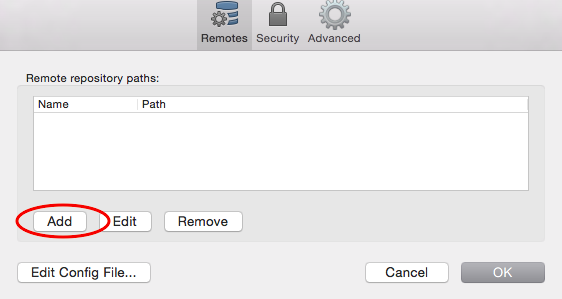
Clicking Add Button - Paste the repository URL you’ve copied from Bitbucket repository into the URL/Path field.
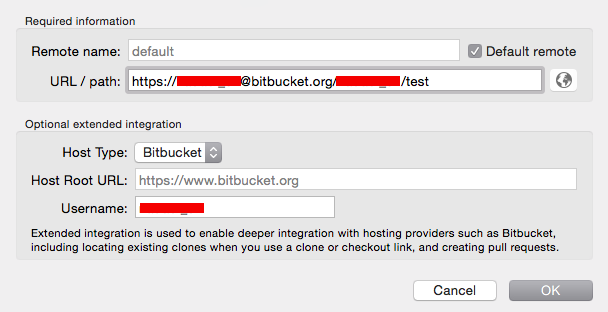
Pasting Repository URL int URL/Path field - Your Remotes tab have to looks like this picture.
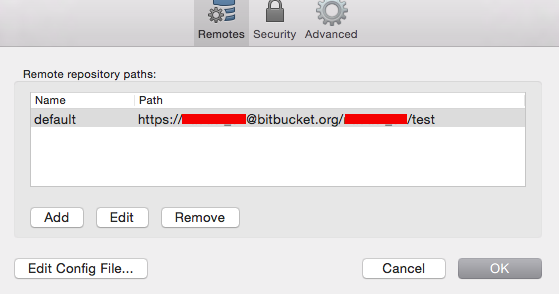
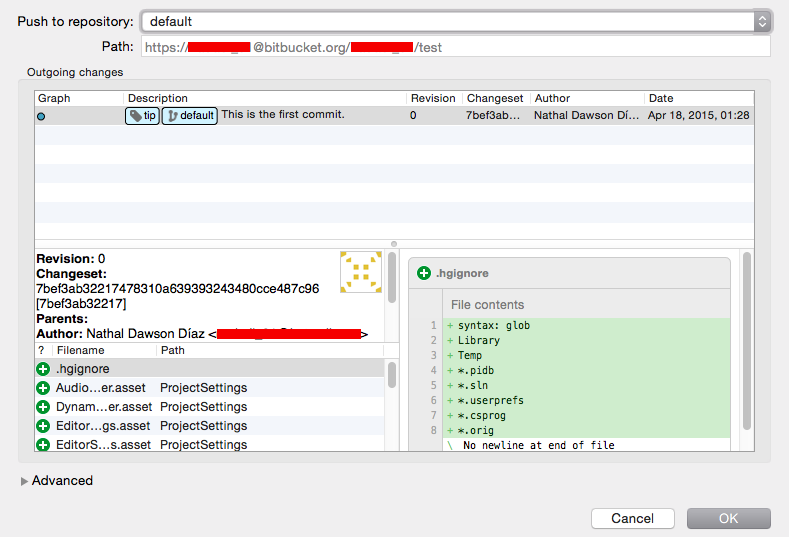
Remotes Tab - So now you have to Push the Commit to the repository, so click on Push Button.
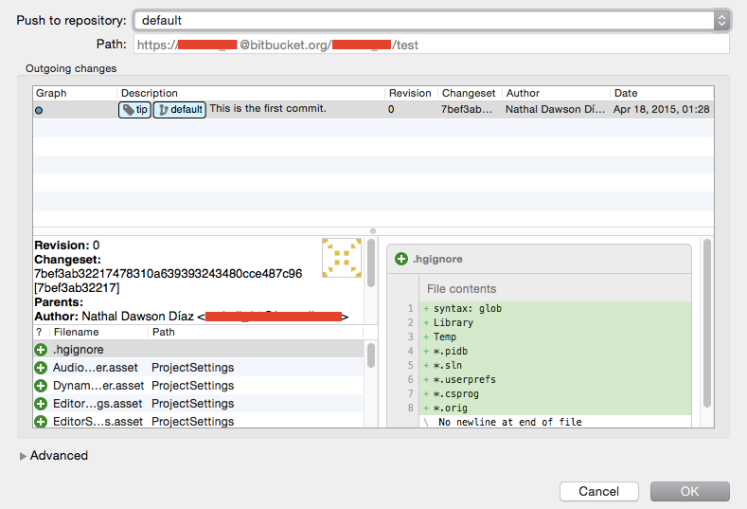
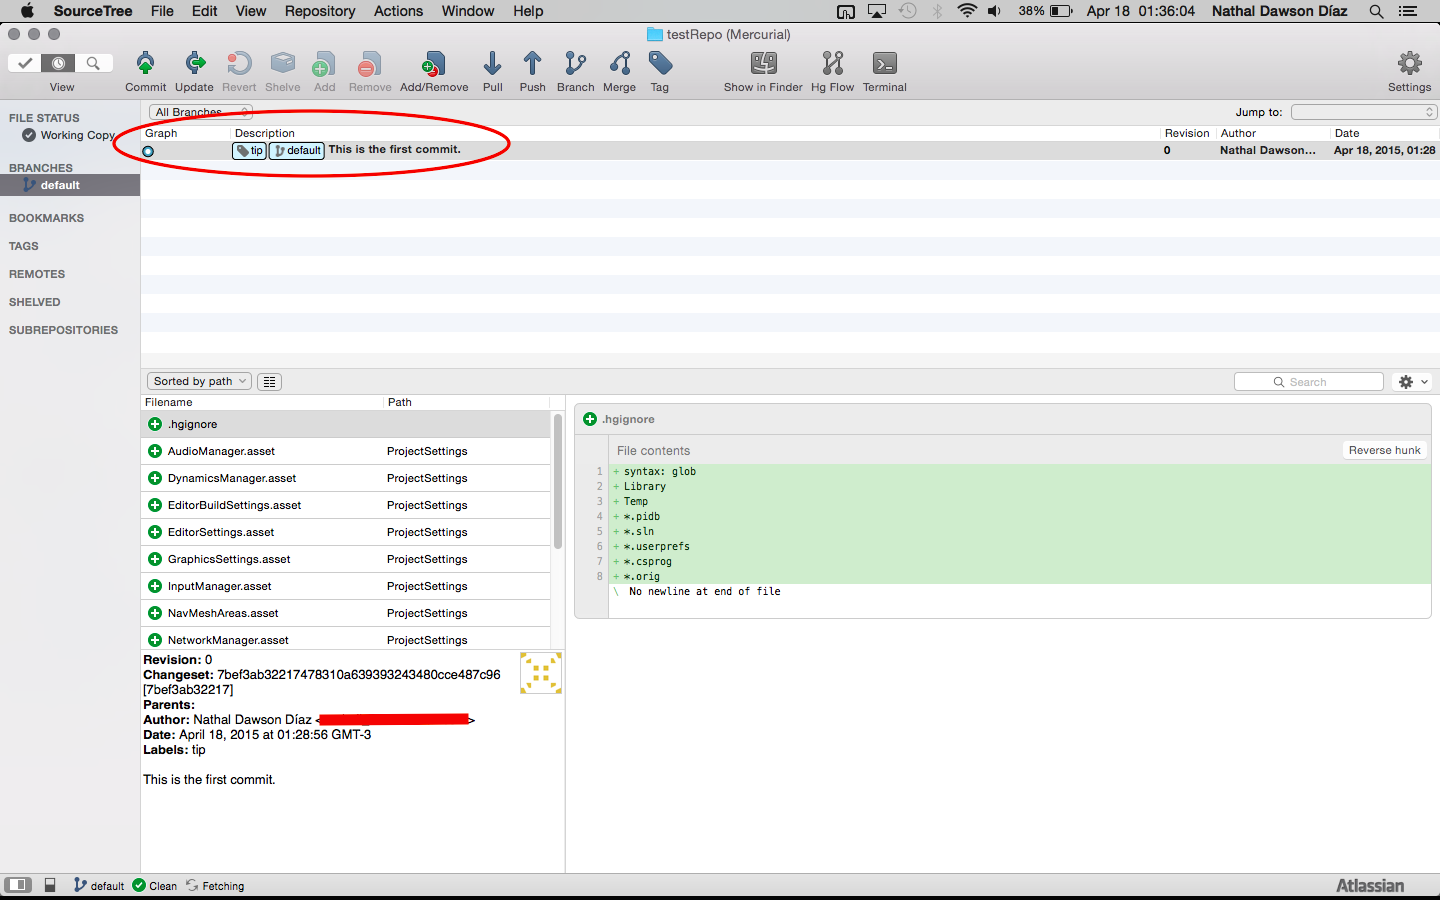
Pushing the first Commit to Repository - Your SourceTree should looks like this picture.
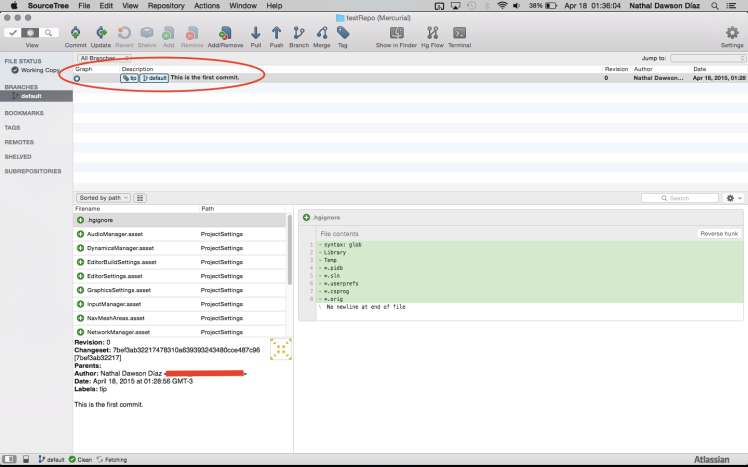
First commit made on Repository


Inviting Users to the Repository
If you are working with a team and want to share the repository:
- From the Bitbucket repository, you have to invite users to the repository (with their Username or Email address).
- The user has to accept the invitation.
- In SourceTree each user has to make a Clone from URL. (Copying and pasting the URL from their Bitbucket repository)
- Make sure each user has the correspond credentials (the BitBucket user account must have been invited) to log in to the SourceTree repository.
- That’s all, ENJOY IT!
If you have any question leave me a comment.
